You’re the Best Part of My Day

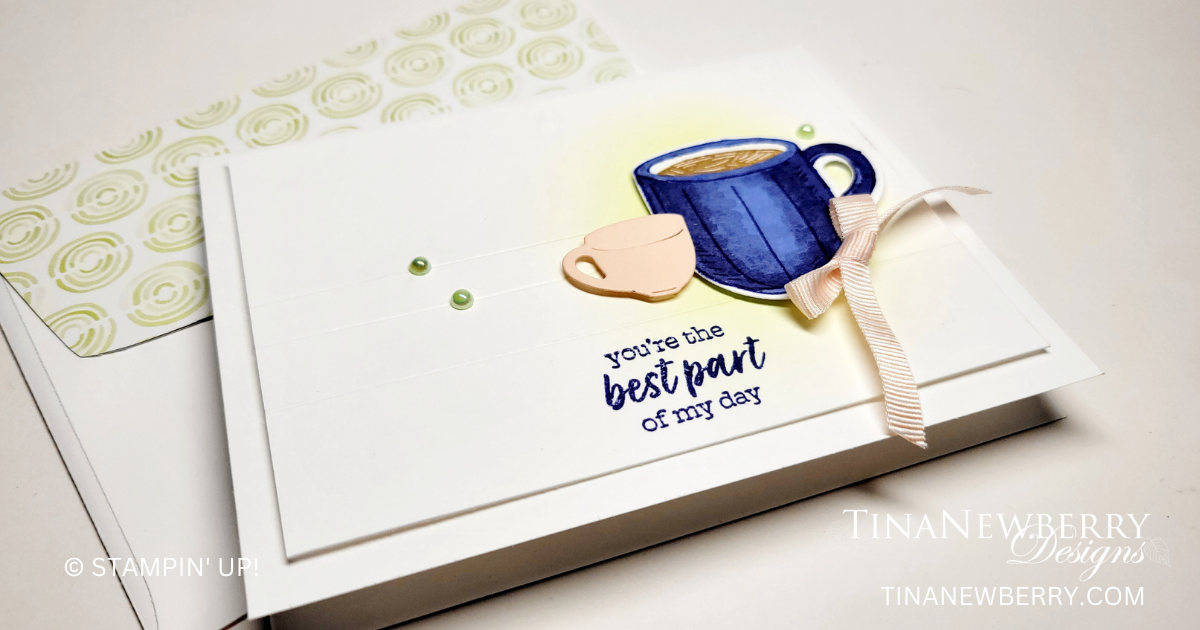
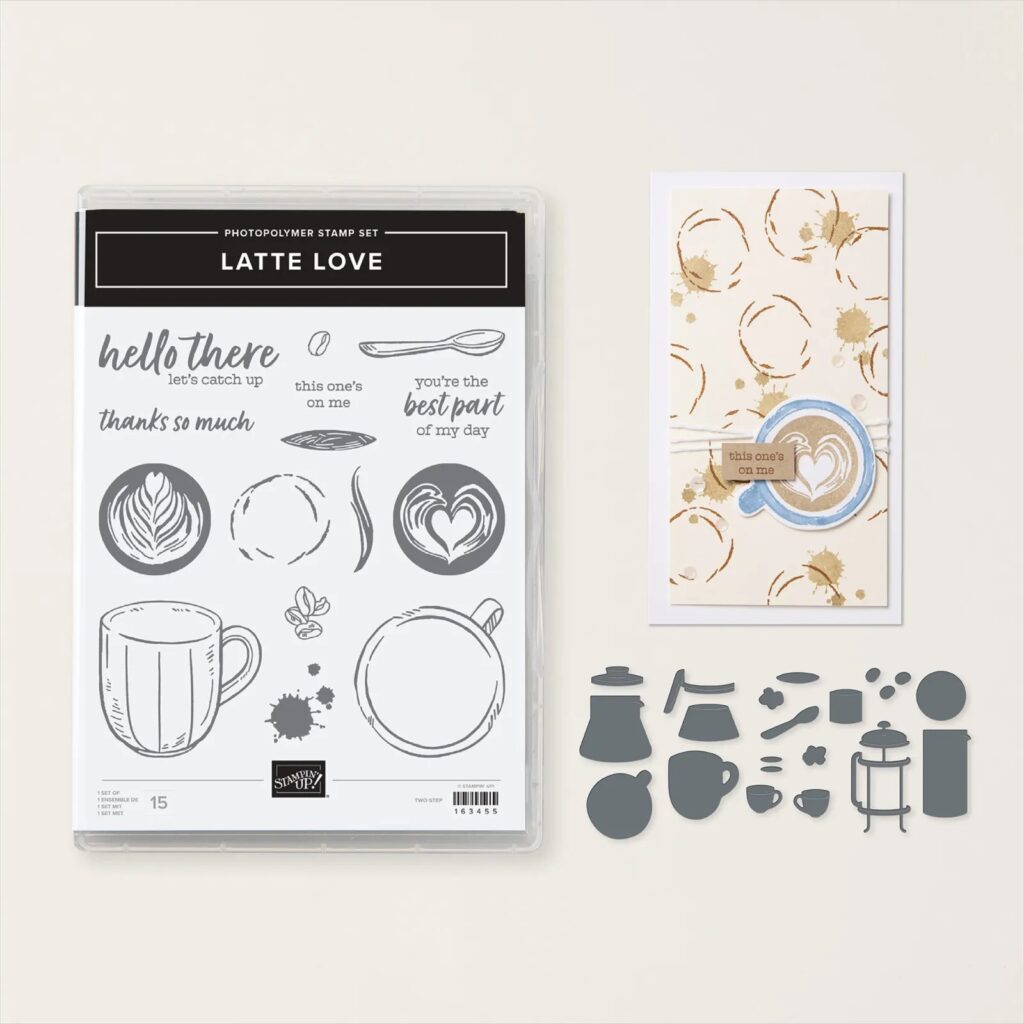
Use a scoring tool and a blending brush to create a simple background for this sweet layout. I used the Latte Love Bundle, but you could substitute any sentiment and focal image.

Spread love and gratitude with the Latte Love Bundle. Create fun paper crafting projects with coffee-themed imagery and heartfelt sentiments and brighten someone’s day!

Measurements

Full list of supplies needed, listed below. A die cutting machine is needed for this card.

Basic White Thick Cardstock: 

  • 5 ½” w x 8 ½” h  scored and folded at 4 ¼” h
  • Scrap for coffee cup

Basic White Cardstock: 5 ½” w x 4 ¼” h (2)

Petal Pink Cardstock: scrap for tea cup


Let’s Create

  1. Affix all stamps to Acrylic Blocks.
  2. On Basic White Thick Cardstock, stamp the coffee cup in Starry Sky ink. Color with Starry Sky Stampin’ Blends as follows:
    1. Mimicking the bottom curve of the coffee cup, use the Dark Starry Sky Blend to extend curved lines out from the left and right edges about ¼ – ½”, all the way up the edge.
    2. Allow about 30 seconds for the ink to dry. 
    3. Using the LIght Starry Sky Blend, repeat the curved lines, starting at the left edge and then going up the right edge extend the lines all the way across the cup.
    4. The idea is to pull some of the darker ink from the edges toward the center.
    5. Allow about 30 seconds for the ink to dry. 
    6. Repeat step a with the Dark Starry Sky Blend.
  3. Die cut the coffee cup.
  4. From a scrap piece of Petal Pink, die cut the tea cup.
  5. Arrange tea cup and coffee cup on one of the 5 ½” w x 4 ¼” h  Basic White Cardstock panels. Mark placement with a light pencil mark, then remove cups.
  6. Stamp Sentiment on 5 ½” w x 4 ¼” h panel off to the side of the cups.
  7. Use a Blending Brush to apply subtle ink to the background of the panel
  8. Use the scoring blade on Paper Trimmer to create three lines ½” apart on the inked panel, across where cups will be placed.
  9. Use Dimensionals to attach the cups.
  10. Fold the Card Base in half using a Bone Folder to sharpen the crease.
  11. Attach the panel to the Card Base with Stampin’ Dimensionals. 
  12. Sprinkle on 2022-2024 In Color Pearls.
  13. Tie a bow with the Petal Pink from the Ribbon Duo combo pack and attach with a Mini Glue Dot.
  14. Stamp and decorate the remaining 5 ¼” w x 4” h for inside
  15. Decorate your envelope.
  16. So sweet! Who will you send it to?

Shopping List

Recommended Stamper’s Toolkit

Product List
Order online from the convenience of your own home or send me your order and I’ll take care of you. ❤ Either way, please use the host code ANTD9UHS. Order online AND, if your order is $50 or more using host code ANTD9UHS between now and the end of the month you’ll receive a free pack of embellishment as a THANK YOU gift from me. ❤ If your order is over $150, skip the host code, earn Stampin’ Rewards for free stuff yourself and I’ll still send you a free pack of embellishment as a THANK YOU gift from me. ❤

Blotting With Saran Wrap Technique

Create your own custom background using the Saran Wrap Technique. Read on for details.

Help your cards, gift tags, and other paper crafts bloom with the Simply Zinnia Stamp & Die Bundle! These stamps have a beautiful hand-etched design and pair perfectly with the floral and greenery dies. Stamp and cut around the individual zinnia blossom, adding some extra dimension with the petals dies. Or build a fun card centerpiece by bundling flowers. You can even create your own unique zinnias with the stem, blossom, and extra greenery dies along with the stamps.

Measurements

Full list of supplies needed, listed below. A die cutting machine is needed for this card.

Basic White Thick Cardstock: 5 ½” w x 8 ½” h scored and folded at 4 ¼” h

Berry Burst: 5 ⅜” x 4 ⅛” 

Basic White

  • 5 ⅛” x 3 ⅞” 
  • 4 ½” x 3” for stamping, coloring and die cutting the flowers

Let’s Create

  1. Affix all stamps to Acrylic Blocks.
  2. Fold the Card Base in half using a Bone Folder to sharpen the crease.
  3. Adhere the Berry Burst Cardstock to the folded Card Base
  4. Using a saran wrap blotting technique, create the background onto the 5 ⅛” x 3 ⅞” Basic White Cardstock.  
    •  BLOTTING WITH SARAN WRAP TECHNIQUE:
      You will need a large acrylic block – minimum size should be an “E” block, “F” is even better. (NOTE: you can also use any type of hard plastic in place of a block)  Two different ink pad colors, I used Flirty Flamingo and Granny Apple Green, a Stampin’ Spritzer, and a small piece of seran wrap.  Put ink onto the block by gently patting the ink once onto the block, no need to press hard.  Spritz with water, 3-4 spritzes, wait a few seconds for the ink to disperse a little.  With the seran wrap wadded up in your hand, tap it into the diluted ink and then blot in a few places onto your cardstock panel.  Vary the pressure a little in different places and turn once in awhile so as not to get a lot of symmetry.  In my card today, I used the “less is more” idea.  I just did a little green, then started the technique again with a clean block, a new piece of saran wrap with the Flirty Flamingo.  This may take a little practice to get the look you want.  More spritz’s with water will lighten your color a little.  A lighter touch will give you a completely different look than a heavier touch.  Play around and practice lots and you will fall in love with this technique for creating fun backgrounds.  This will dry pretty quickly while you’re finishing the other elements of the card.
  5. Using Black Memento Ink, stamp the largest zinnia flowers (3 flower stem) onto the Basic White 4 ½” x 3”  piece of cardstock.  Color the flowers, leaves and stems using Stampin’ Blends.  I used Berry Burst,  Daffodil Delight and Granny Apple Green. Die Cut the image using the coordinating Die from the Simply Zinnia Dies. 
  6. Using Black Memento ink, stamp the sentiment towards the lower right of Basic White background panel.
  7. Using Stampin’ Dimensionals adhere the flowers toward the left side of the card.
  8. Adhere these layers to the card base.
  9. Randomly Place 3 of the pink Adhesive-backed Shiny Sequins to the card.
  10. Don’t forget to decorate the inside of the card as well as the envelope, and it’s ready for you to send it off to brighten someone’s day!

Shopping List

Recommended Stamper’s Toolkit

Product List
Order online from the convenience of your own home or send me your order and I’ll take care of you. ❤ Either way, please use the host code ANTD9UHS. Order online AND, if your order is $50 or more using host code ANTD9UHS between now and the end of the month you’ll receive a free pack of embellishment as a THANK YOU gift from me. ❤ If your order is over $150, skip the host code, earn Stampin’ Rewards for free stuff yourself and I’ll still send you a free pack of embellishment as a THANK YOU gift from me. ❤

Words Fail to Express My Gratitude

The colors and that big zinnia are gorgeous! Simply Zinnias is an Online Exclusive product. Have you checked out all the newest Online Exclusives lately? New products are being added regularly. Simply Zinnias is available as a bundle or you can order the stamp set and dies seperately. This beautiful bundle is also available in the Flowering Zinnias Suite.

Help your cards, gift tags, and other paper crafts bloom with the Simply Zinnia Stamp & Die Bundle! These stamps have a beautiful hand-etched design and pair perfectly with the floral and greenery dies. Stamp and cut around the individual zinnia blossom, adding some extra dimension with the petals dies. Or build a fun card centerpiece by bundling flowers. You can even create your own unique zinnias with the stem, blossom, and extra greenery dies along with the stamps.

Measurements

Full list of supplies needed, listed below. A die cutting machine is needed for this card.

Basic White Thick Cardstock: 5 ½” w x 8 ½” h scored and folded at 4 ¼” h

Pretty Peacock

  • 5 ⅜” x 4 ⅛”
  • Scraps for Die cutting stems/leaves

Pool Party: 5 ¼” x 4”

Basic White

  • 4” x 1 ¼” for sentiment
  • Scraps for stamping and die cutting flowers

Let’s Create

  1. Affix all stamps to Acrylic Blocks.
  2. Fold the Card Base in half using a Bone Folder to sharpen the crease.
  3. Using the Zinnia 3-D Embossing Folder, emboss the 5 ¼” x 4” Pool Party Cardstock.
  4. Stamp the single Zinnia and 1 set of leaves using Black memento ink onto a basic white scrap.  Stamp the image with the 3 flowers from the stamp set onto a Basic White Scrap.  You’ll only be using the tallest flower from the stamped image.  Die cut all of the flowers and leaves using the coordinating dies from the Simply Zinnia Die set.  The only flower that will matter in the stamped image of the 3 flowers is the tallest one.  Die cut to get the most of the shape and then cut it apart from the others.  Or if you don’t mind fussy cutting, you could just fussy cut the whole flower.
  5. Using Stampin’ Blends, color your images.  I used Pretty Peacock, Melon Mambo and Daffodil Delight. I also used the color lifter on the leaves to lighten the color a bit.
  6. Using the small stem with the 2 leaves attached, die cut 2 stems from Pretty Peacock cardstock. 
  7. Stamp the sentiment using Pretty Peacock ink onto Basic White Cardstock.  Die cut using the largest  banner die from the Stylish Shapes Die set.  The sentiment is a bit tight for this die.  DIE CUTTING TECHNIQUE: I enlarged the size the die will cut by cutting just part if the image –  from one end to about an inch to the other end.  Pull the image and the die from the  cutting machine without going the rest of the way.  Reposition the die at the other end to make the sentiment fit, you can easily feel where the die should line up with the part that’s cut. Put just the uncut end through the die cutting machine.  You can use this technique with many of our labels, and shapes, to enlarge the opening. 
  8. Wrap a piece of the Pretty Peacock Ribbon around the Embossed Pool Party Cardstock and tape on the back.  Using Stampin’ Seal, adhere the Pool Party cardstock to the 5 ⅜” x 4 ⅛” Pretty Peacock cardstock.  Adhere these layers to the folded Card Base.
  9. Take another length of ribbon approximately 4” and fold in half having the ends staggered just a bit from each other.  Trim the ends at an angle making one end a tad shorter than the other.  Tape this to the ribbon that has been wrapped around the card in a place where it will be covered by the flower.
  10. Adhere the large Zinnia with Stampin’ Dimensionals.  Position the smaller flower above the larger flower, taped flat.  Position the stems for both of the flowers and tape in place.  
  11. Using Stampin’ Seal, tape down the stamped and colored set of leaves where you would like.
  12. Using Stampin’ Dimensionals adhere the sentiment label towards the bottom of the card.
  13. Randomly place 3 Pretty Peacock Foiled Gems to your card.
  14. Don’t forget to decorate the inside of your card and the envelope.

Shopping List

Recommended Stamper’s Toolkit

Product List
Order online from the convenience of your own home or send me your order and I’ll take care of you. ❤ Either way, please use the host code ANTD9UHS. Order online AND, if your order is $50 or more using host code ANTD9UHS between now and the end of the month you’ll receive a free pack of embellishment as a THANK YOU gift from me. ❤ If your order is over $150, skip the host code, earn Stampin’ Rewards for free stuff yourself and I’ll still send you a free pack of embellishment as a THANK YOU gift from me. ❤